Last Updated on
Hercules is Scarlet’s all-in-1 wireless tower crane camera system to enhance safe blind lifts and worksite monitoring. The system can be easily deployed by following our step-by-step instructions.
Overview of the Hercules
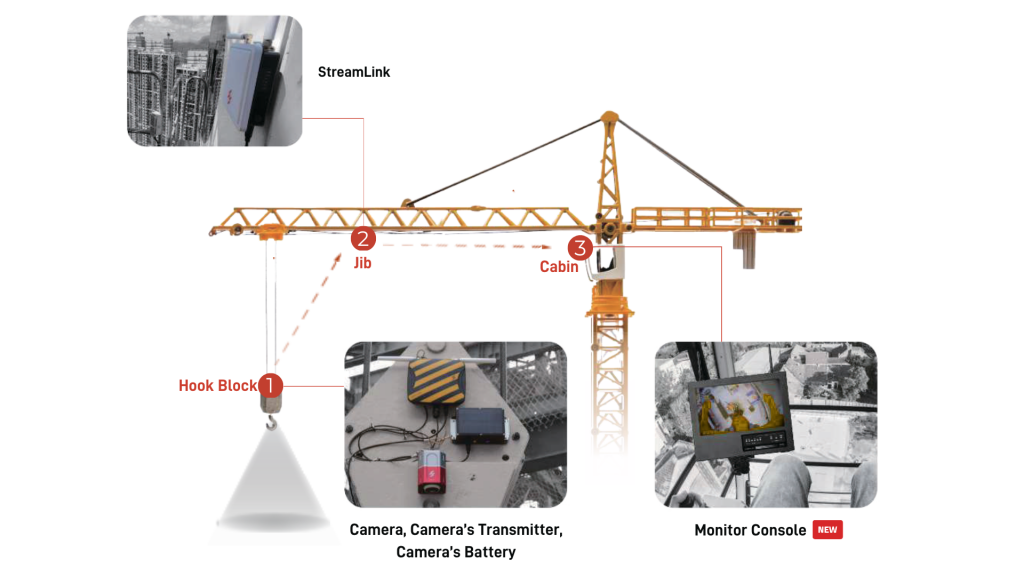
Hercules is installed in three crane areas; here is an overview of where the main components are located:

Step-by-Step Installation Guide
Hook Block
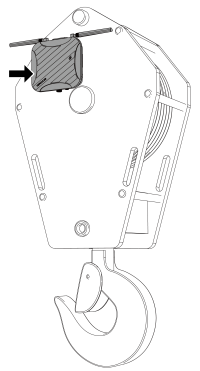
- Camera’s Transmitter
- Install two 5 GHz omnidirectional antennas on the 90-degree angle antenna transmitter which is pre-installed on the N-type port of the transmitter.

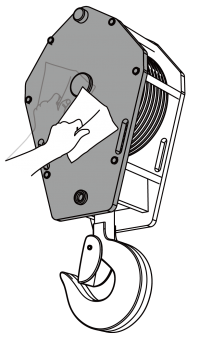
- Wipe clean the crane hoist surface.

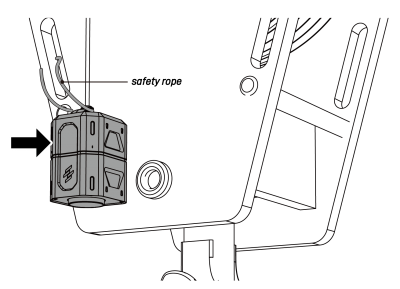
- Mount the transmitter on the crane’s hoist surface. For added safety, secure the transmitter with a safety rope to the crane hoist.
Note: For having better wireless signal quality, two antennas of the camera’s transmitter should be parallel to the ground. Use the cable collector to ensure the safety rope is tightened and clear of obstacles.
- Install two 5 GHz omnidirectional antennas on the 90-degree angle antenna transmitter which is pre-installed on the N-type port of the transmitter.
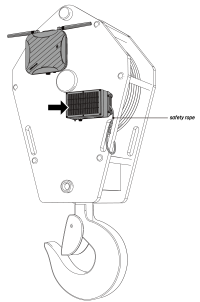
- Camera’s Battery
- Mount the battery pack on the crane’s hoist surface. For added safety, secure battery pack with a safety rope to the crane hoist.
Note: Use the cable collector to ensure the safety rope is tightened and clear of obstacles.
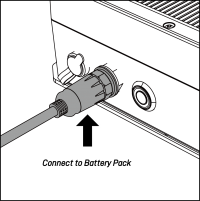
- Use a 3-pin power cable to connect the battery pack and the camera’s transmitter.

Connect to Camera’s Battery
Connect to Camera’s Transmitter
- Camera
- Mount the camera on the crane’s hoist surface. For added safety, secure battery pack with a safety rope to the crane hoist.
Note: Use the cable collector to ensure the safety rope is tightened and clear of obstacles.

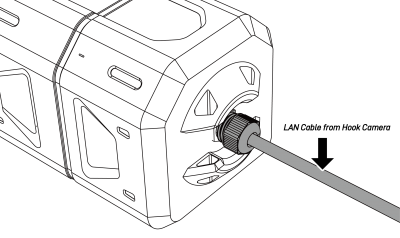
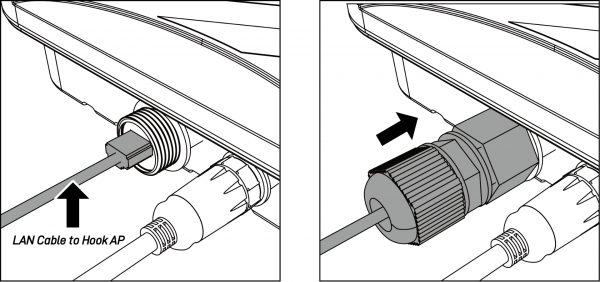
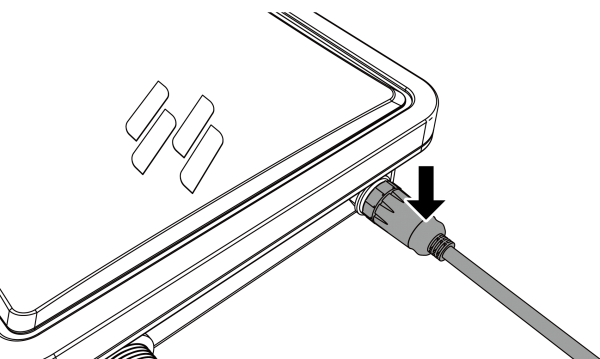
- Connect the camera and the camera’s transmitter using a waterproof LAN cable.

LAN Cable from Camera

LAN Cable to Camera’s Transmitter
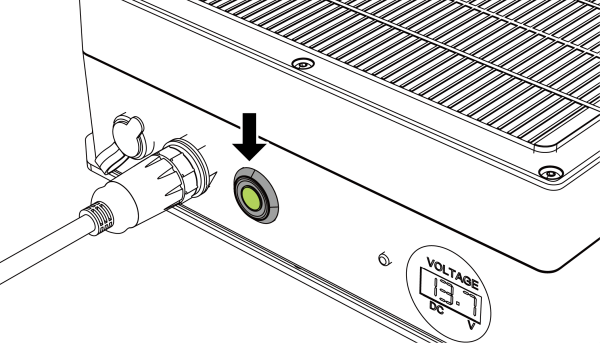
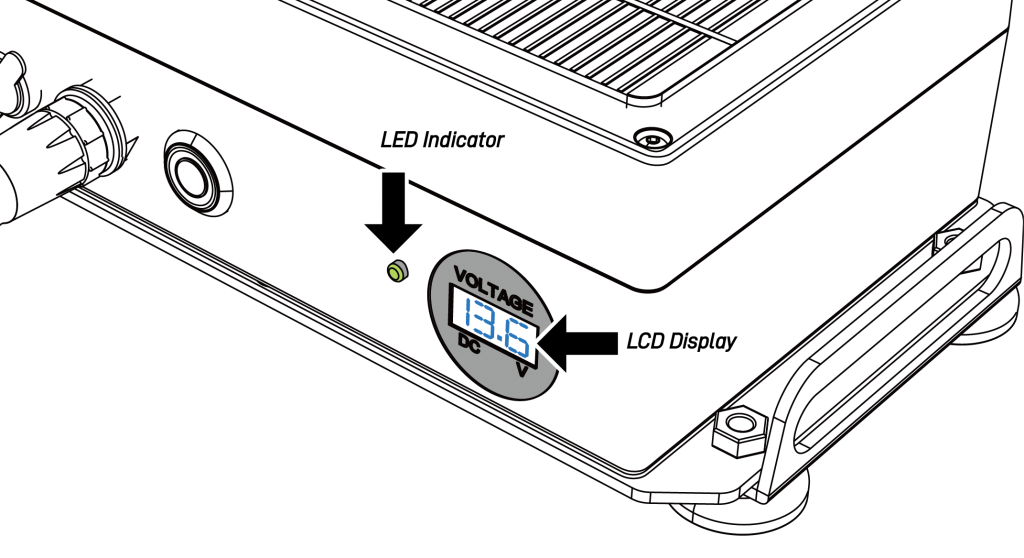
- On the camera’s battery, press the power on/off button and the battery starts to supply power to the camera and transmitter.

- Meanwhile on the battery, make sure the LCD display and LED indicators are ON.

- Also, make sure the LED indicator on the transmitter is ON.

- Mount the camera on the crane’s hoist surface. For added safety, secure battery pack with a safety rope to the crane hoist.
- Mount the battery pack on the crane’s hoist surface. For added safety, secure battery pack with a safety rope to the crane hoist.
Jib
- StreamLink
- Install one 5 GHz omnidirectional antennas on the N-type port of StreamLink.
- Install another 5 GHz omnidirectional antenna on the 90° angle antenna transmitter which is pre-installed on the N-type port of StreamLink.

- Wipe clean the crane jib surface.
- Mount the StreamLink on the crane’s jib surface. For added safety, secure StreamLink station with a safety rope to the jib.
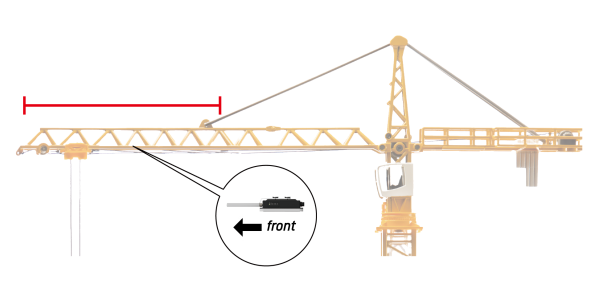
- StreamLink station should be placed at least half of the jib length and closer to the crane hook.
- One antenna should point to the front direction and another one point to the left or right direction. These two should be parallel to the ground.

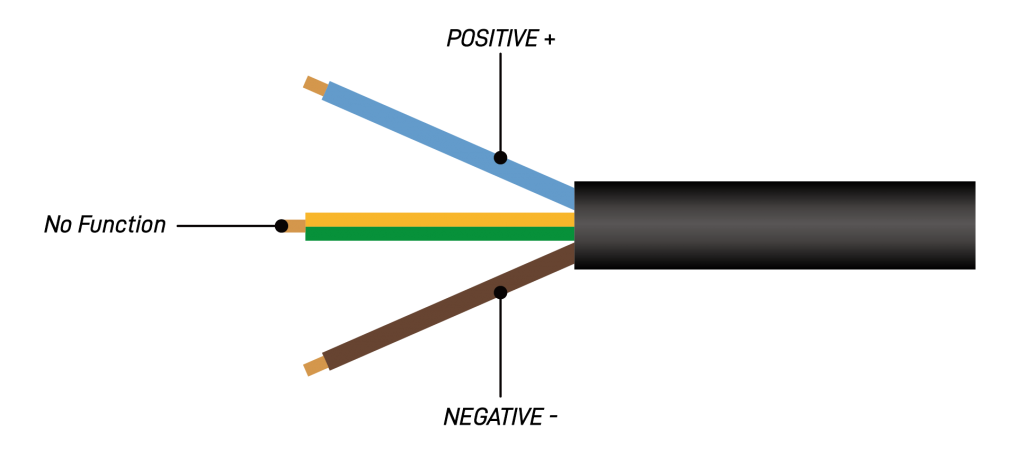
- Connect the 3-pin power cord (50 meters) to the StreamLink.

- Do wire stripping for the power cord and then connect to your DC 24V power source. Please note the blue core is the POSITIVE and the brown one is the NEGATIVE. (The yellow/green one has no function)

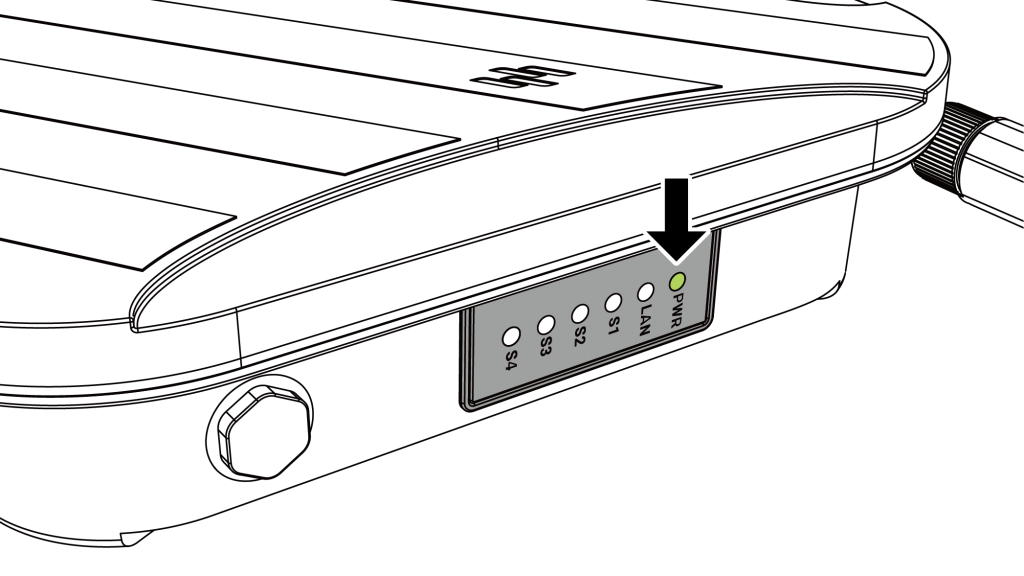
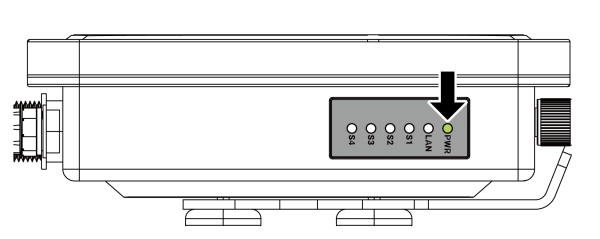
- Check the LED indicator on the StreamLink. If the PWR becomes green steady, it means the StreamLink Station is boot-up successfully.

Cabin
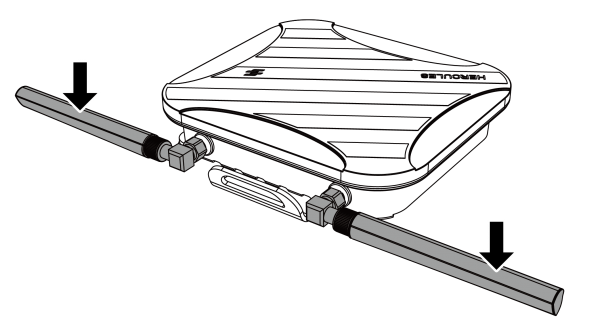
- Monitor Console
- Before proceeding with the installation of the Monitor Console, ensure that both Camera Transmitter and Streamlink are installed and operational.
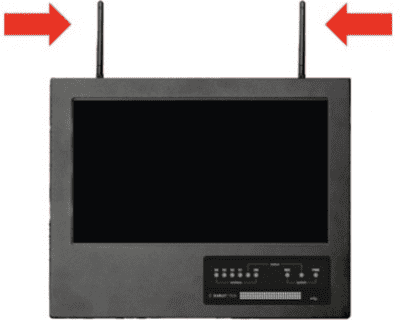
- Install both antennas onto the top of the Monitor Console.
![]()
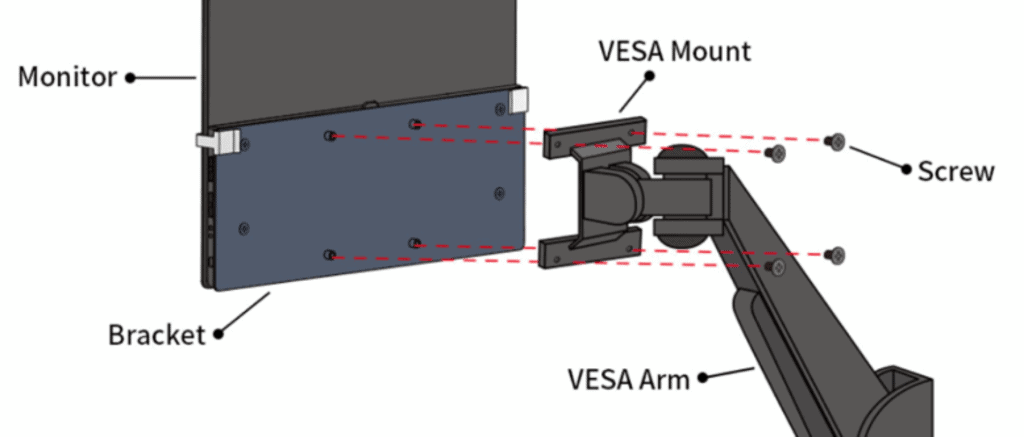
- Affix the holder to the back of the Monitor Console using screws.
![]()
- Securely attach the Monitor Console in the cabin’s left corner using the holder clamp.

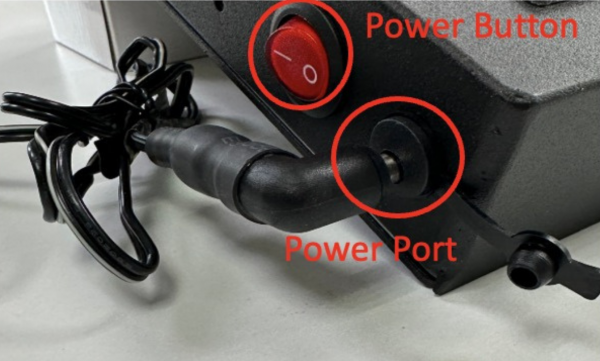
- Connect the power source to Monitor Console using the adapter.
- Power on the Monitor Console by pressing the power button and wait for the boot-up process to complete.