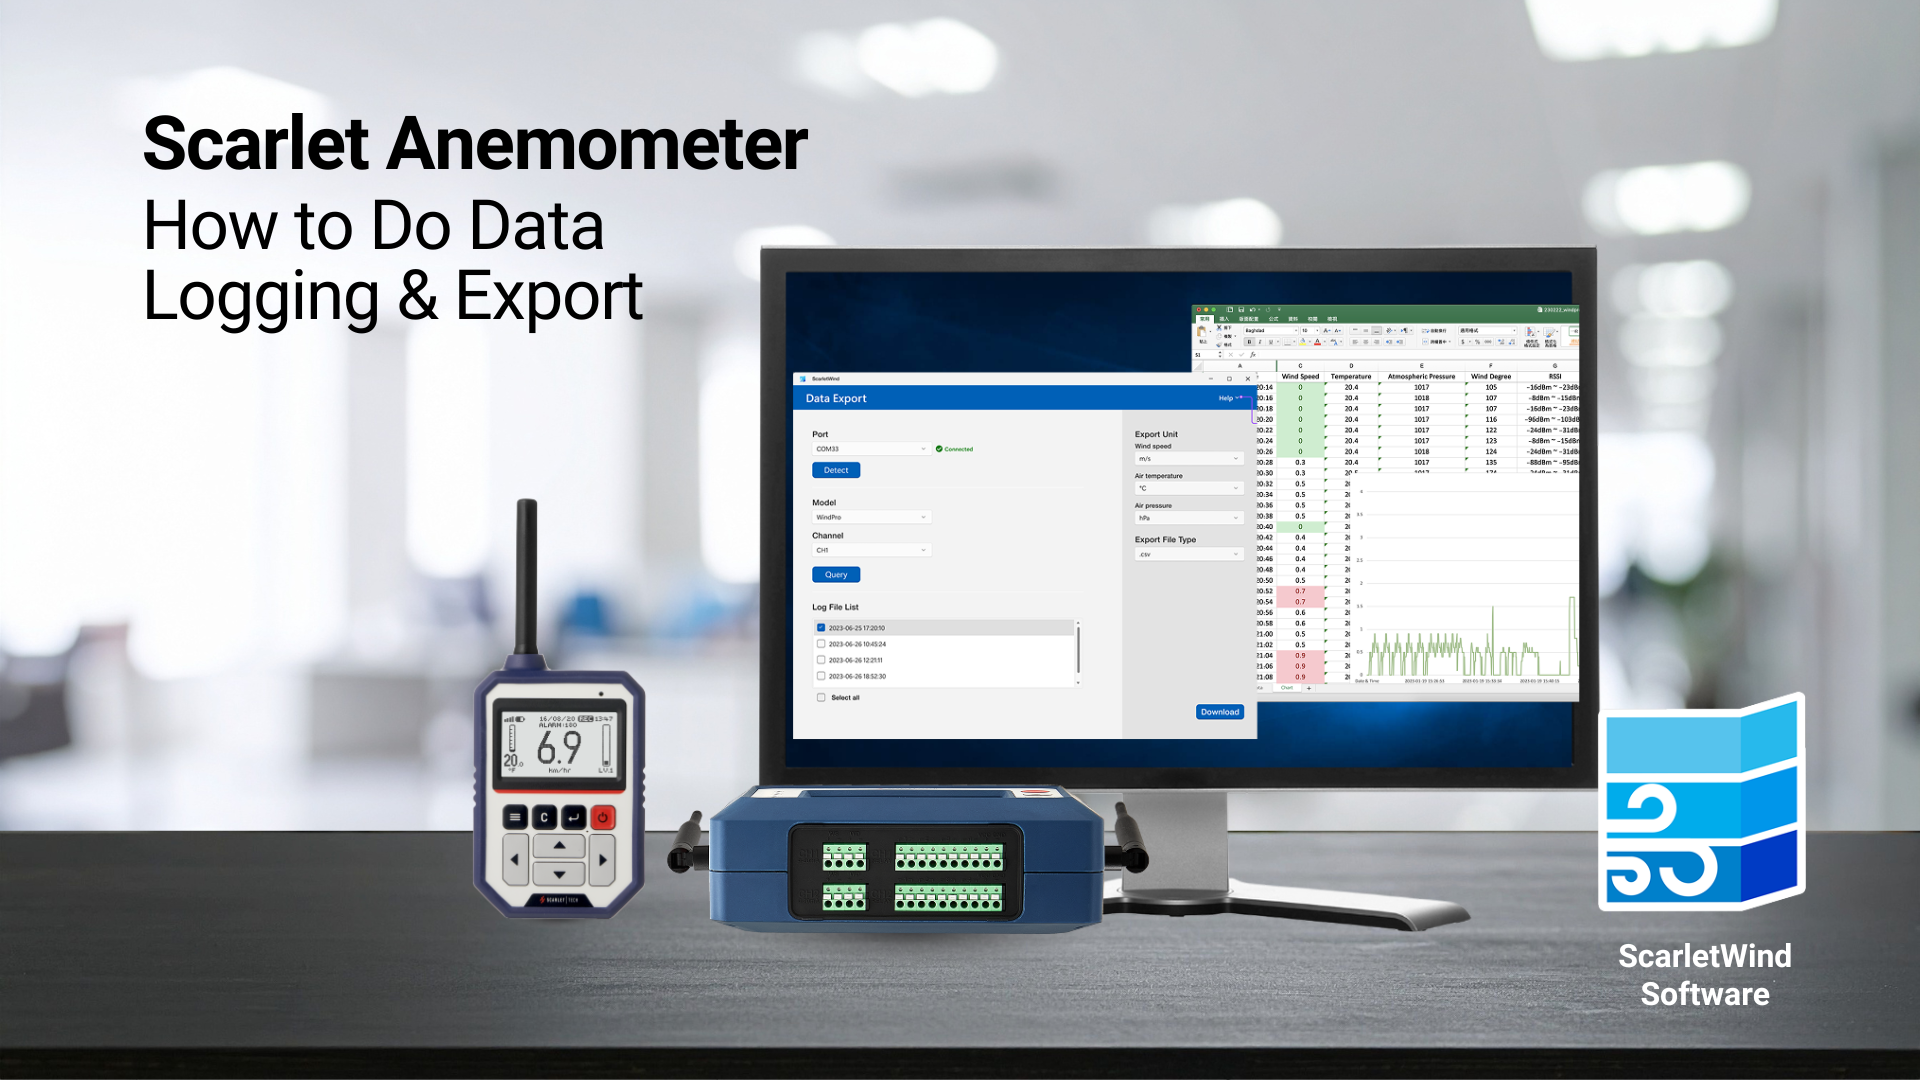
This article explains how to do data logging and perform data export, applicable for WR-3 Plus, WL-21, and WindPro models.
Guide to enable data logging
WR-3 Plus & WL-21
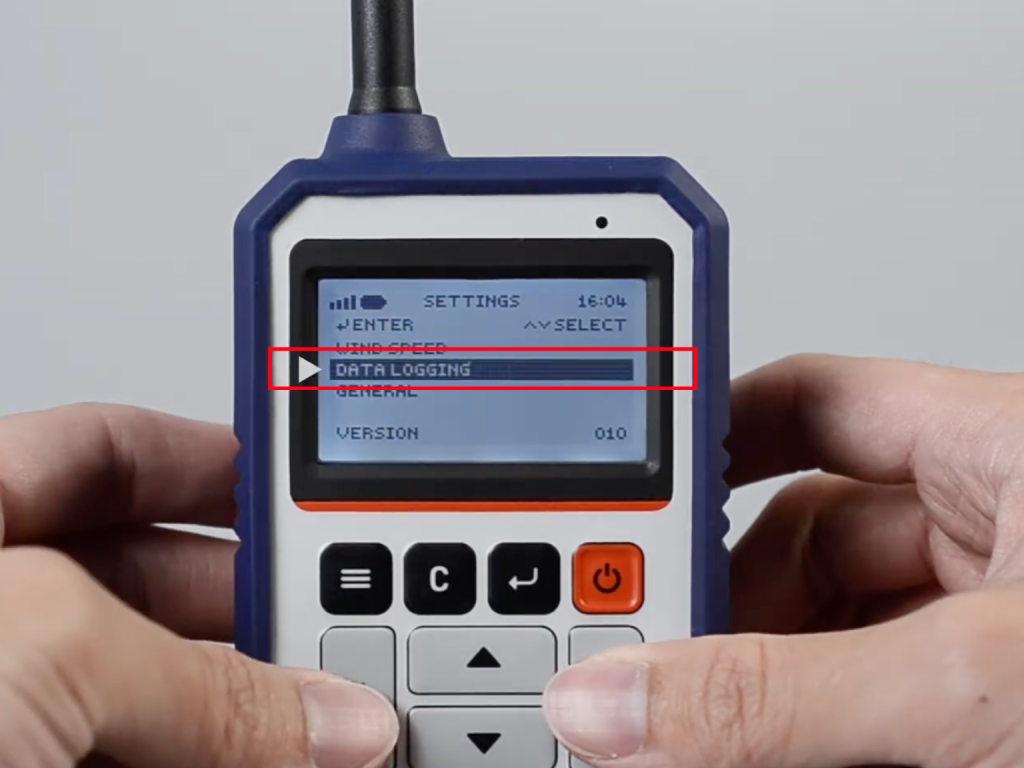
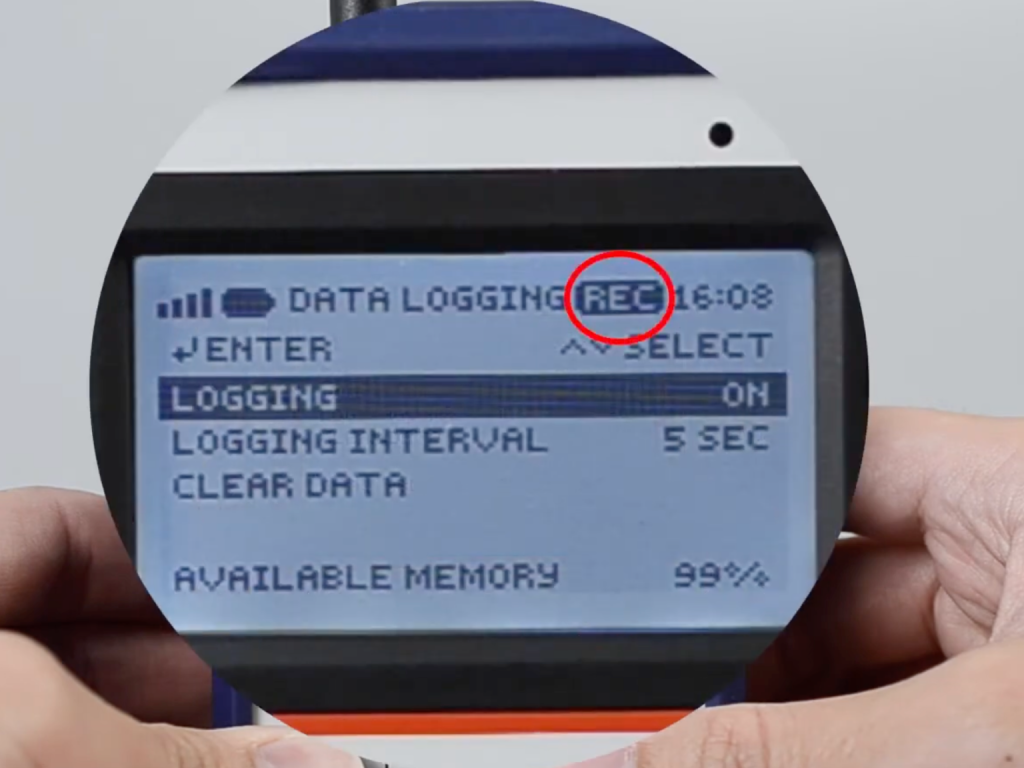
1. On the receiver, press the “3-line / SETTINGS” button and navigate to “DATA LOGGING”.
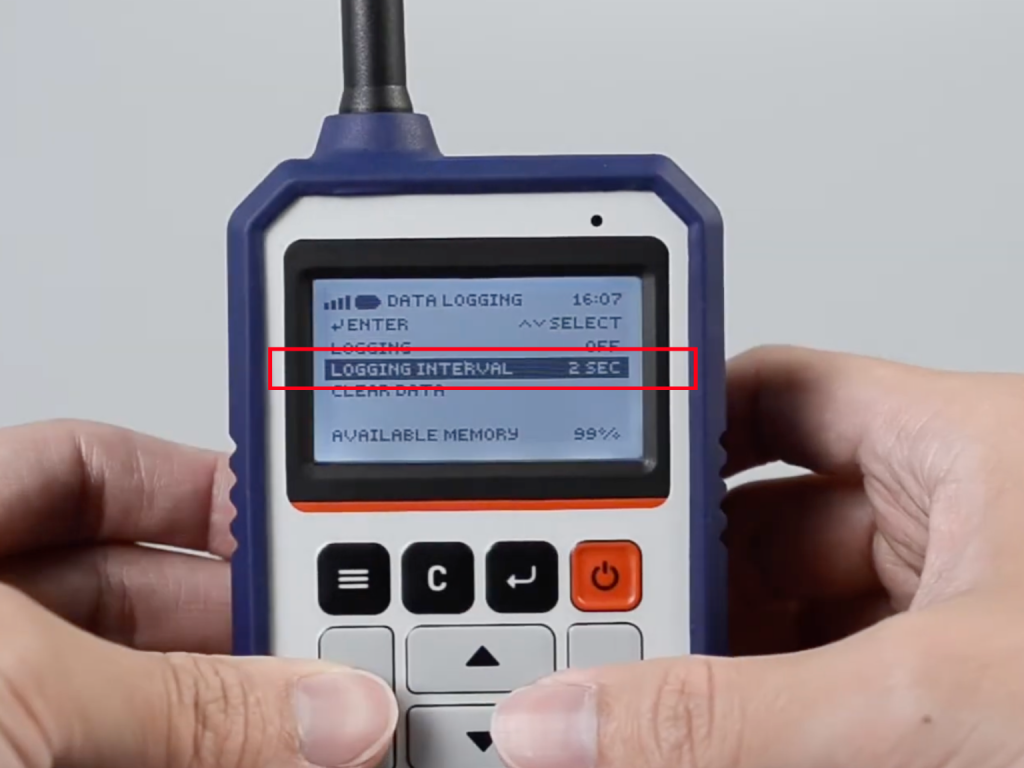
2. Go to “LOGGING INTERVAL” to set desired logging interval (Logging interval can only be altered while the data logging function is OFF)
3. Go to “LOGGING” and change the setting from “OFF” to “ON”.
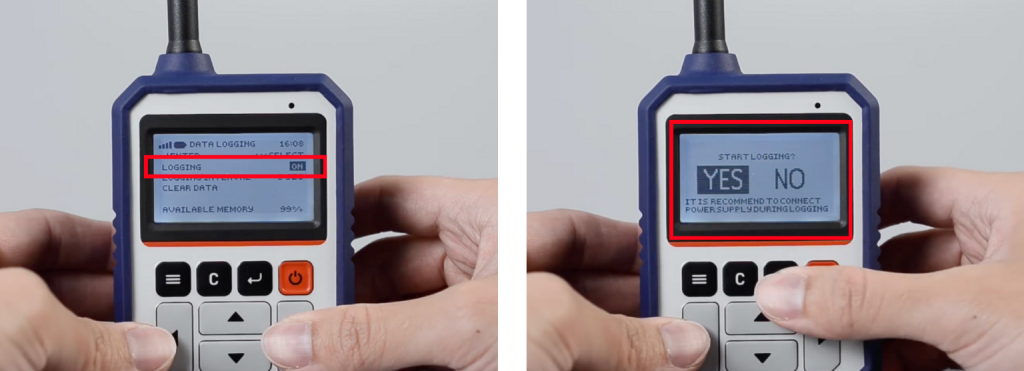
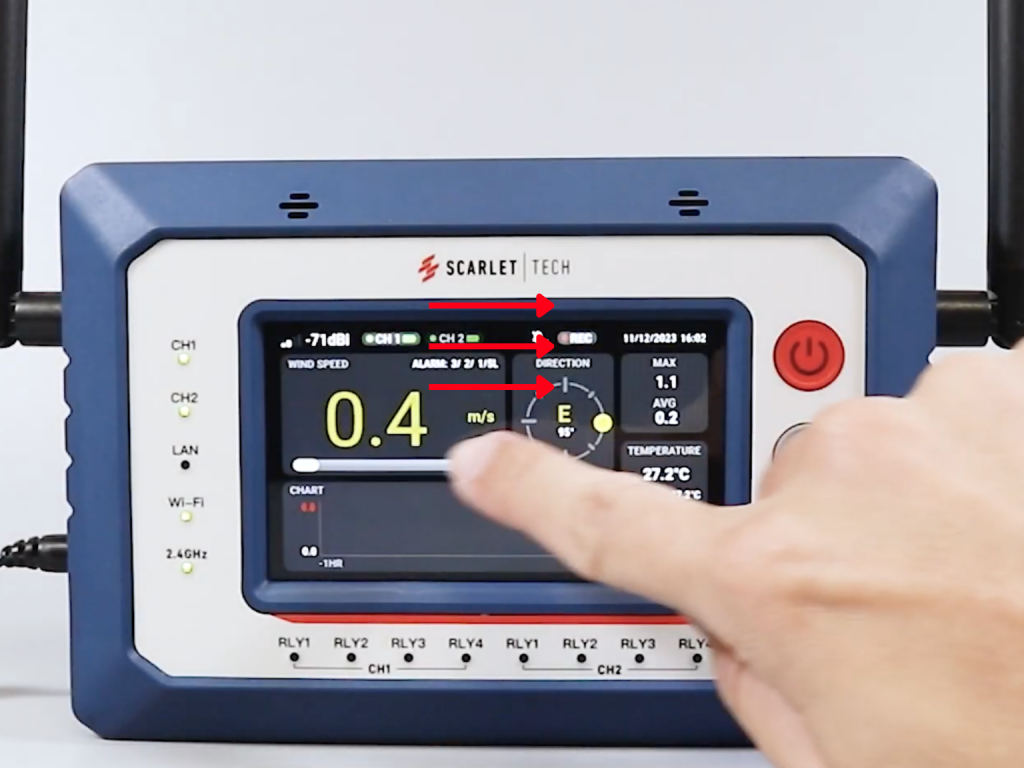
4. When the “REC” icon shows up, it means the receiver begins to record wind data.
WindPro
The logging function is enabled automatically once WindPro is powered on. If the logging function was previously turned off, follow the steps below to turn it back on:
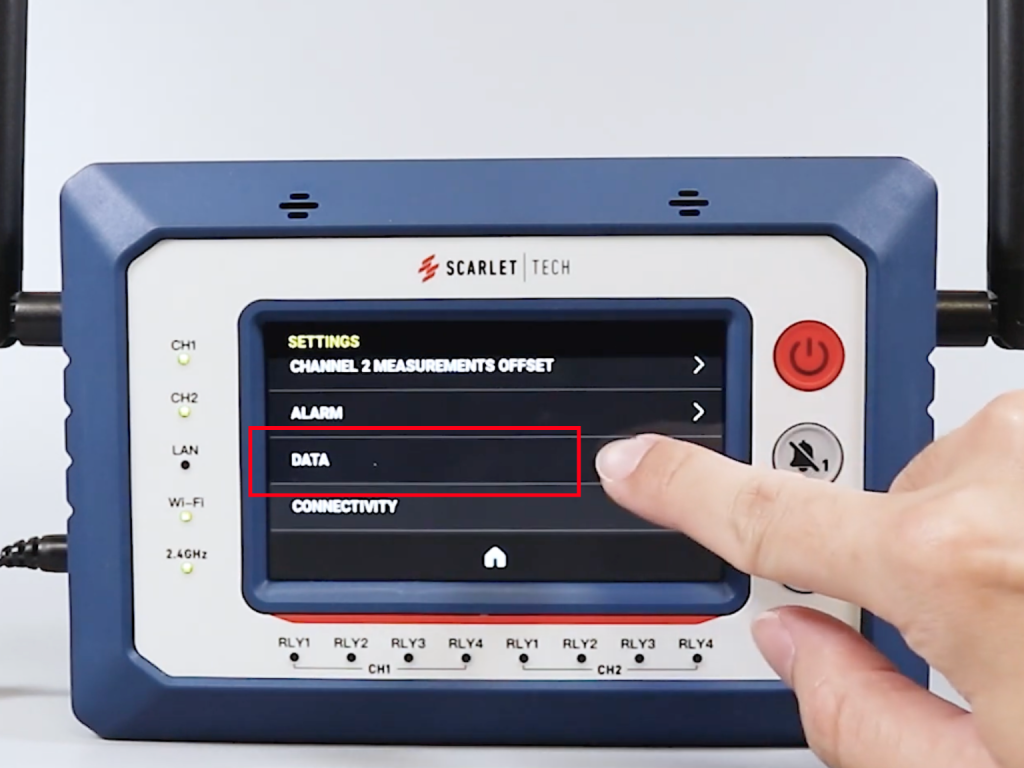
1. On the console, slide right to access the “SETTINGS” menu.
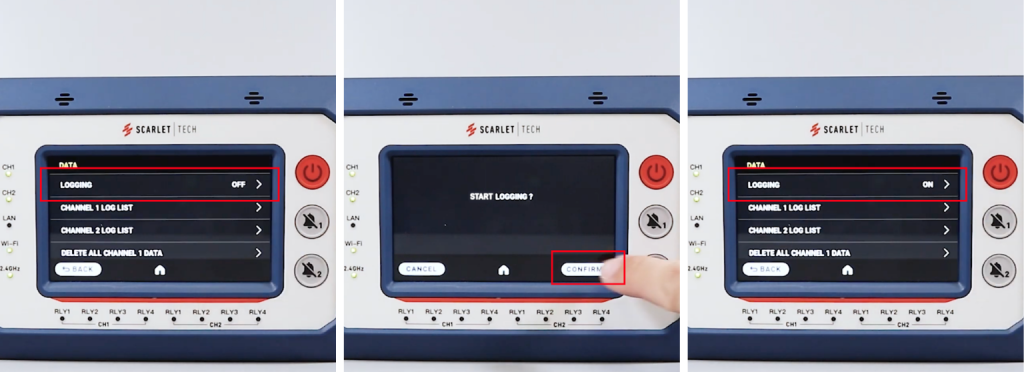
2. Scroll down to “DATA” > “LOGGING”.
3. Press “OFF” to toggle logging on and “CONFIRM”.
Note: If the receiver/console shuts down unexpectedly (e.g., power shortage) while data logging is in progress, log files may be corrupted.
Guide to export data
1. To export log data, the data logging function must be turned off:
a. WR-3 Plus & WL-21
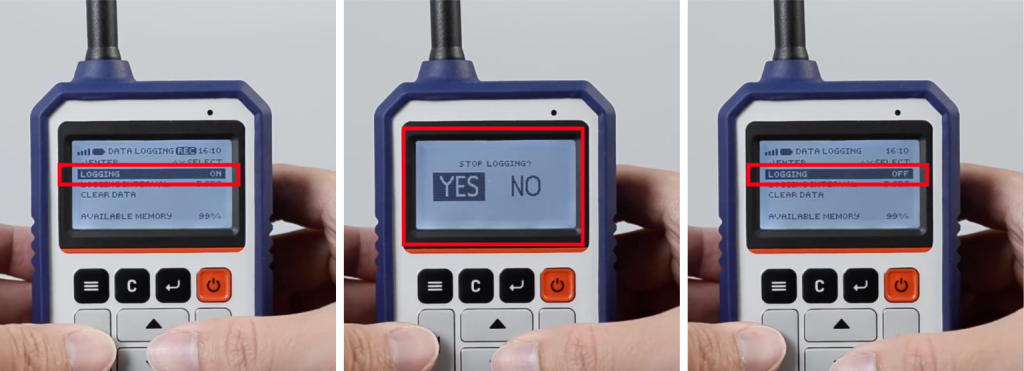
i. Navigate to “DATA LOGGING” > “LOGGING” and change the setting from “ON” to “OFF”.
ii. When prompted with “STOP LOGGING?”, select “STOP”.
b. WindPro
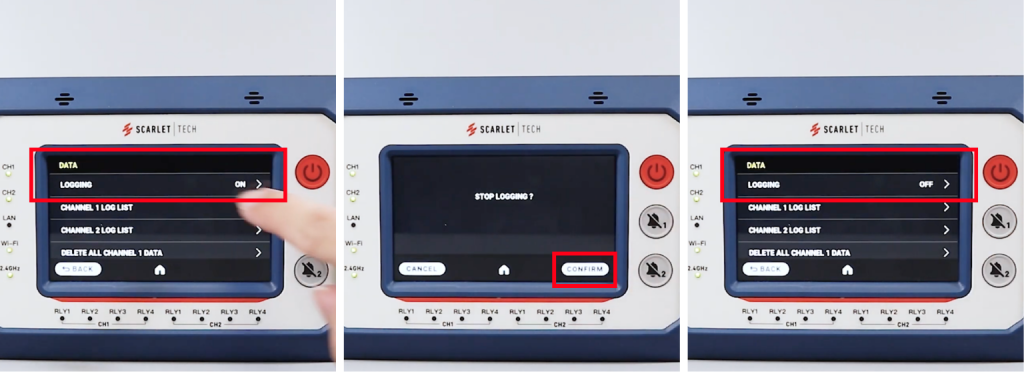
i. On the console, slide right to access the “SETTINGS” menu.
ii. Scroll down to “DATA” > “LOGGING”.
iii. Press “ON” to toggle logging off.
iv. When “STOP LOGGING?” appears, press “CONFIRM”.
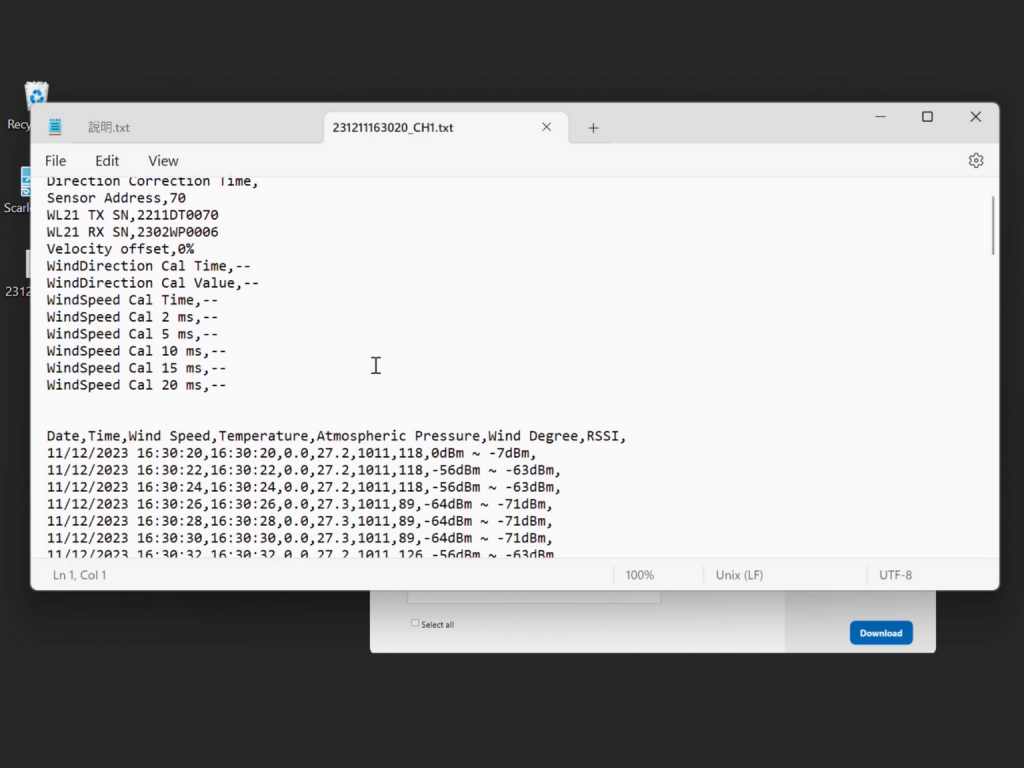
2. Connect the device to your PC using the USB cable, and ensure the device is powered on.

3. Install ScarletWind software
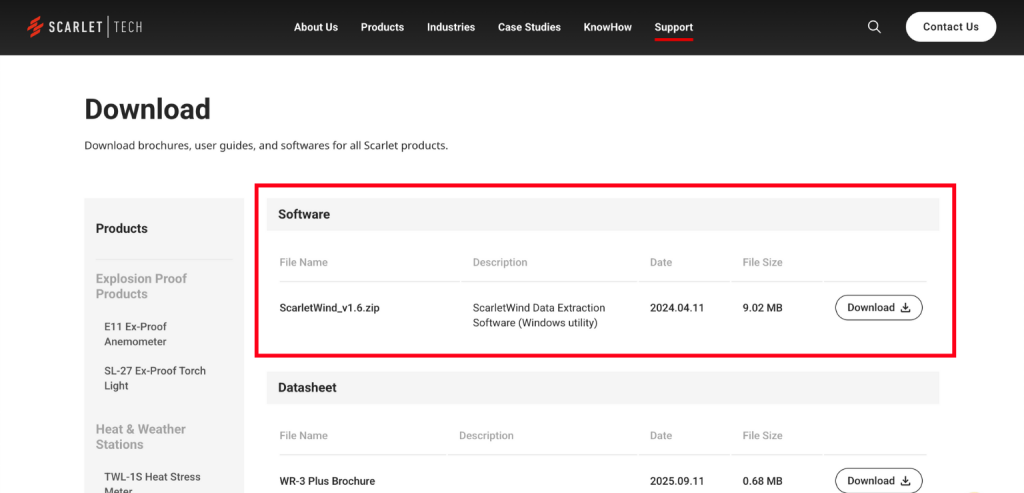
Go to https://scarlet-tech.com/support/download/. On the left menu, select the product model you have (WR-3 Plus, WL-21, or WindPro), you will find ScarletWind software. Download the zip file and extract it to your computer.
4. Launch ScarletWind and export data
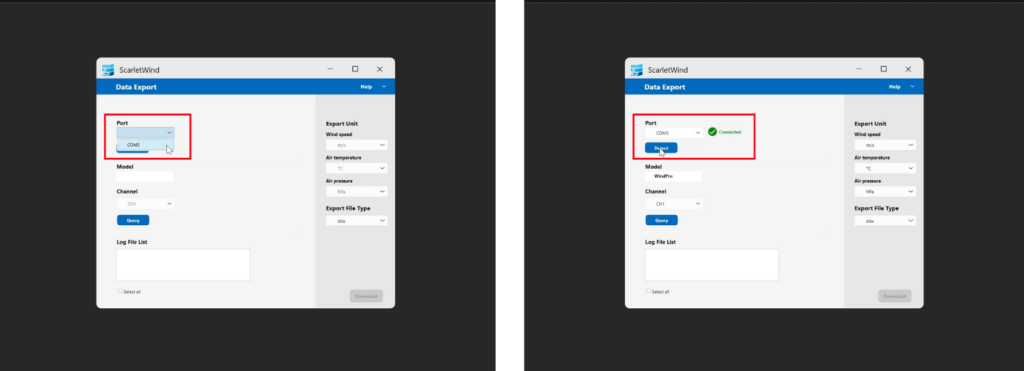
a. Open ScarletWind on your PC.
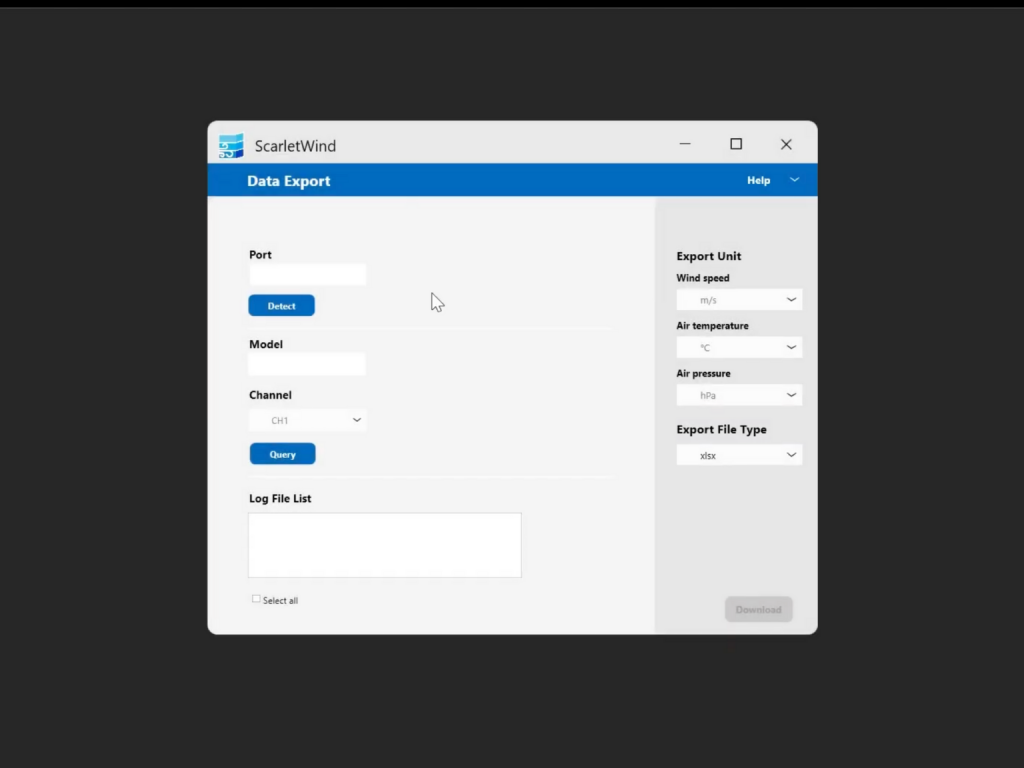
b. Select the correct COM port, then click “Detect.”
i. A green checkmark and “Connected” status will appear once the receiver is recognized.
ii. ScarletWind will automatically identify the connected model.
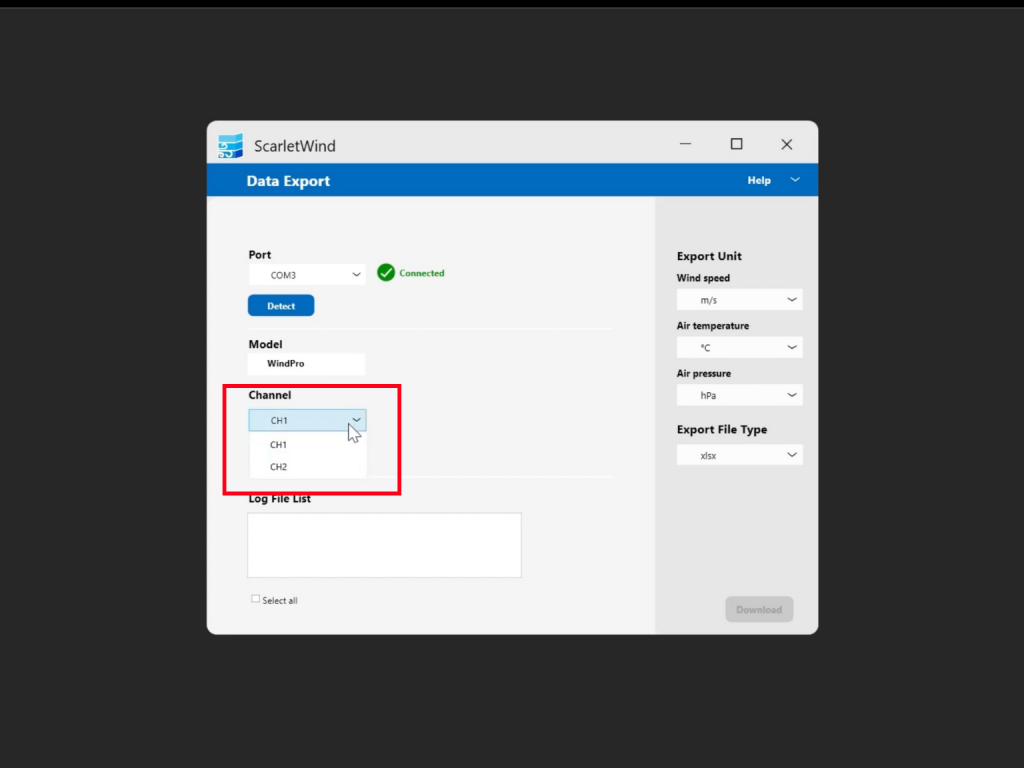
iii. For WindPro users: If your WindPro console is connected to two wind sensors, you can choose Channel 1 or Channel 2 accordingly.
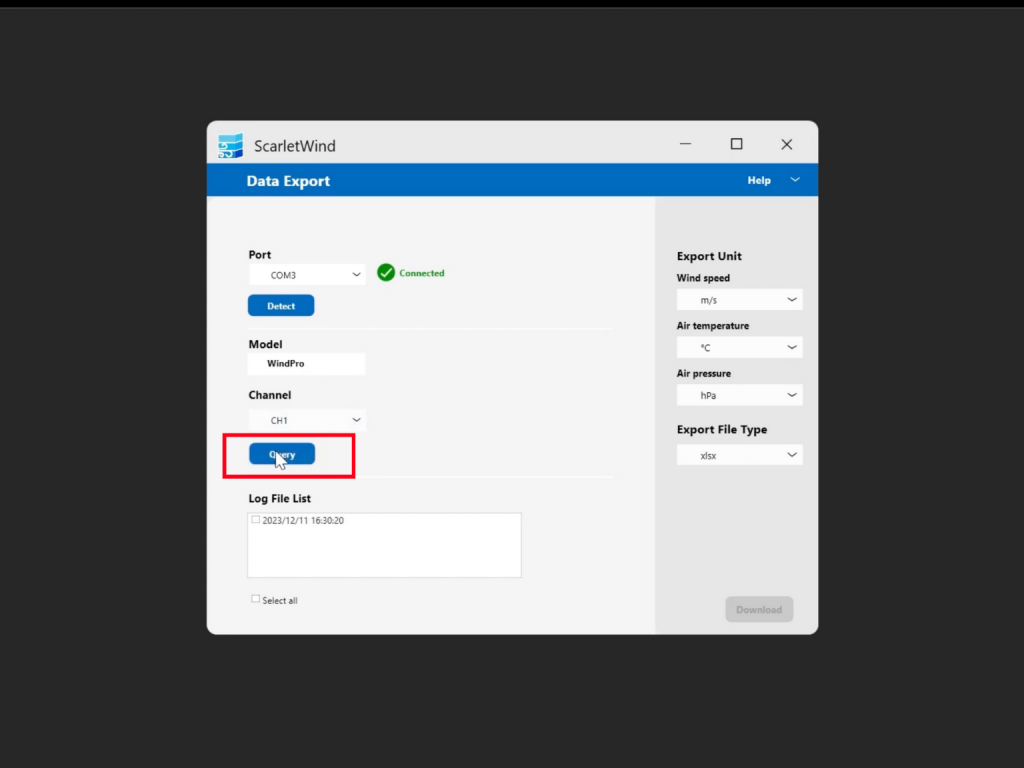
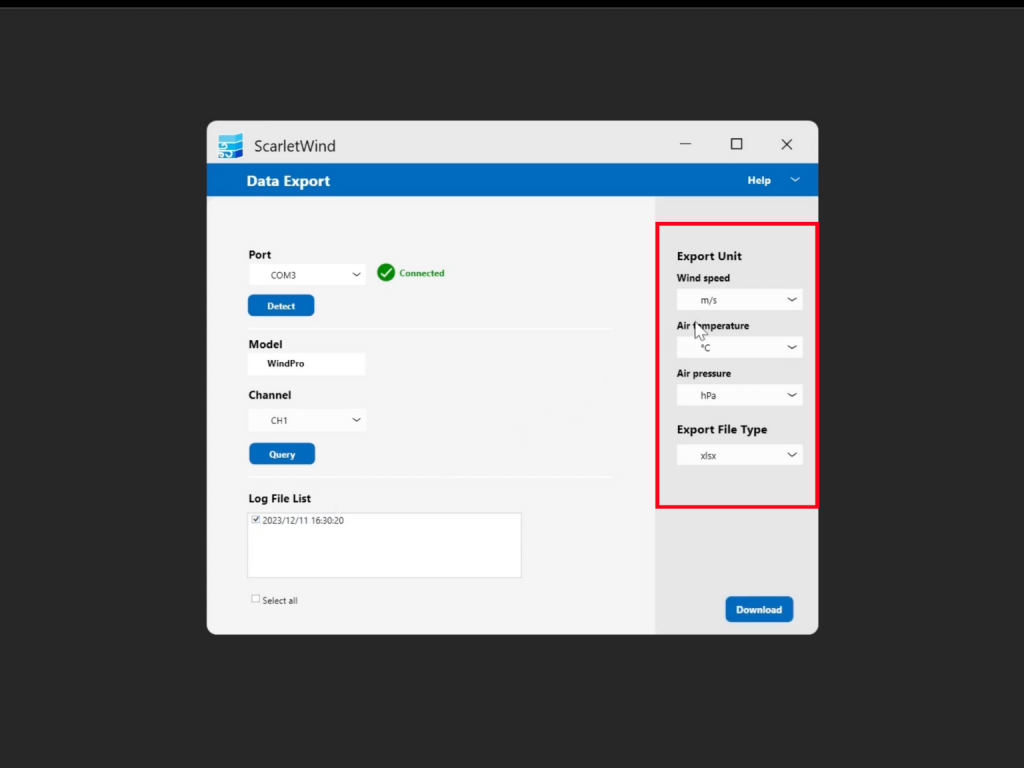
c. Click “Query” to display the Log File List.
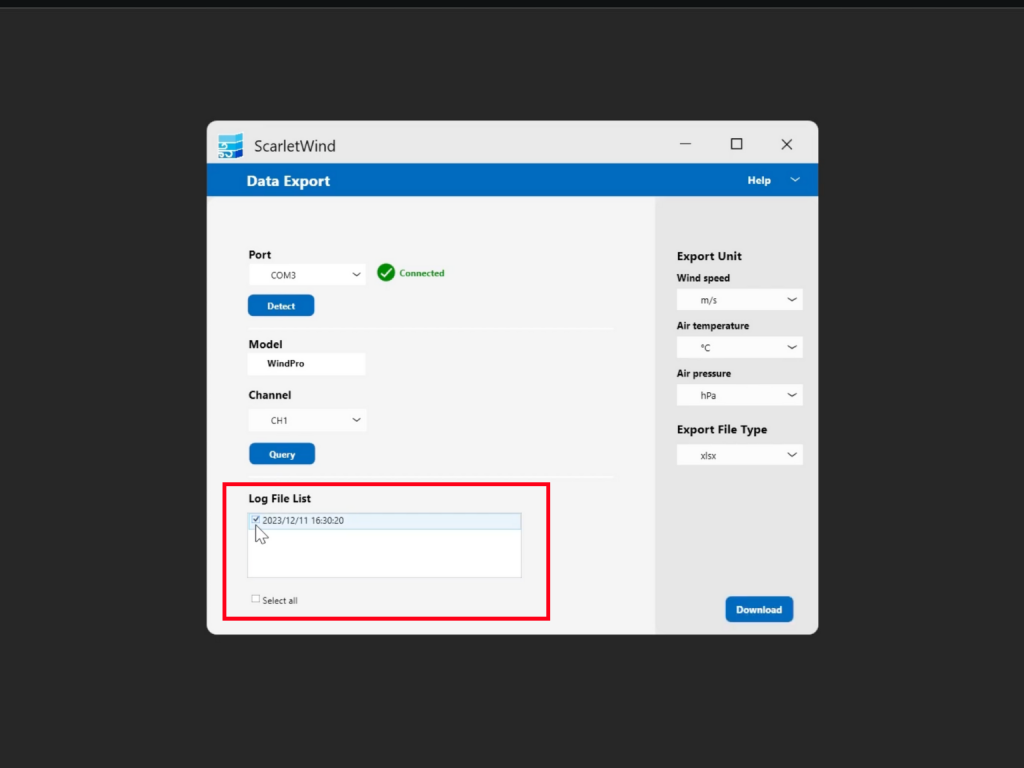
d. Select the log file you wish to download.
e. Under Export Unit, choose your preferred measurement unit and file type.
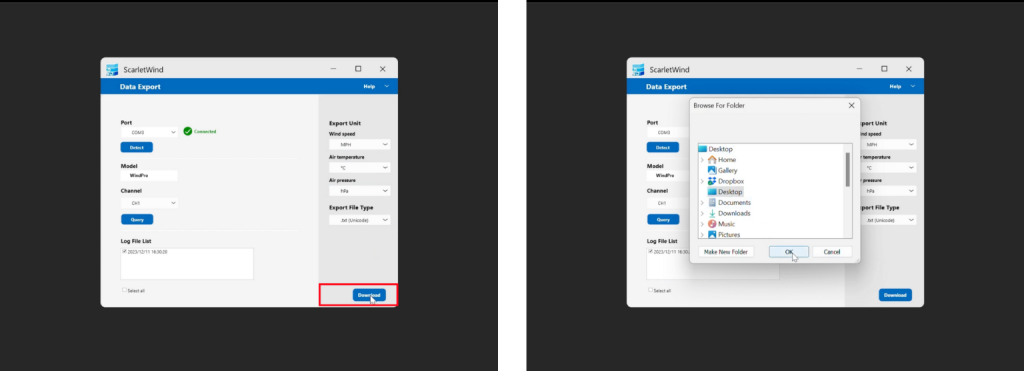
f. Click “Download”, then select the destination folder on your PC and click “OK”.
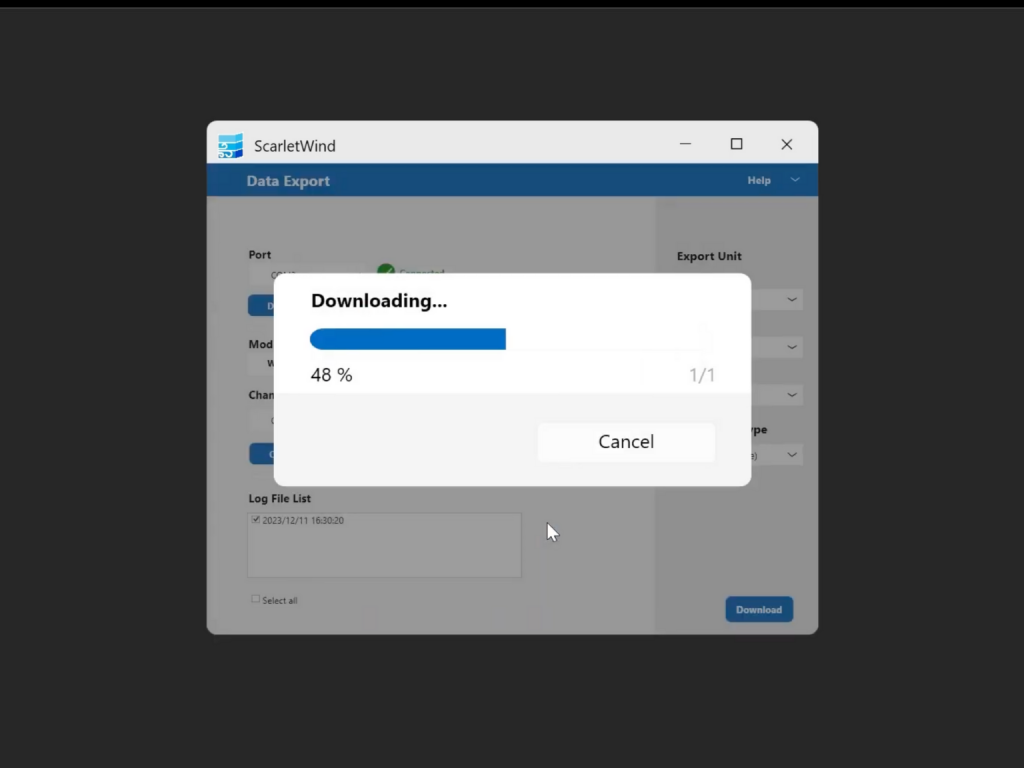
g. A download progress window will pop up. Please wait, as the download time may depend on the file size.
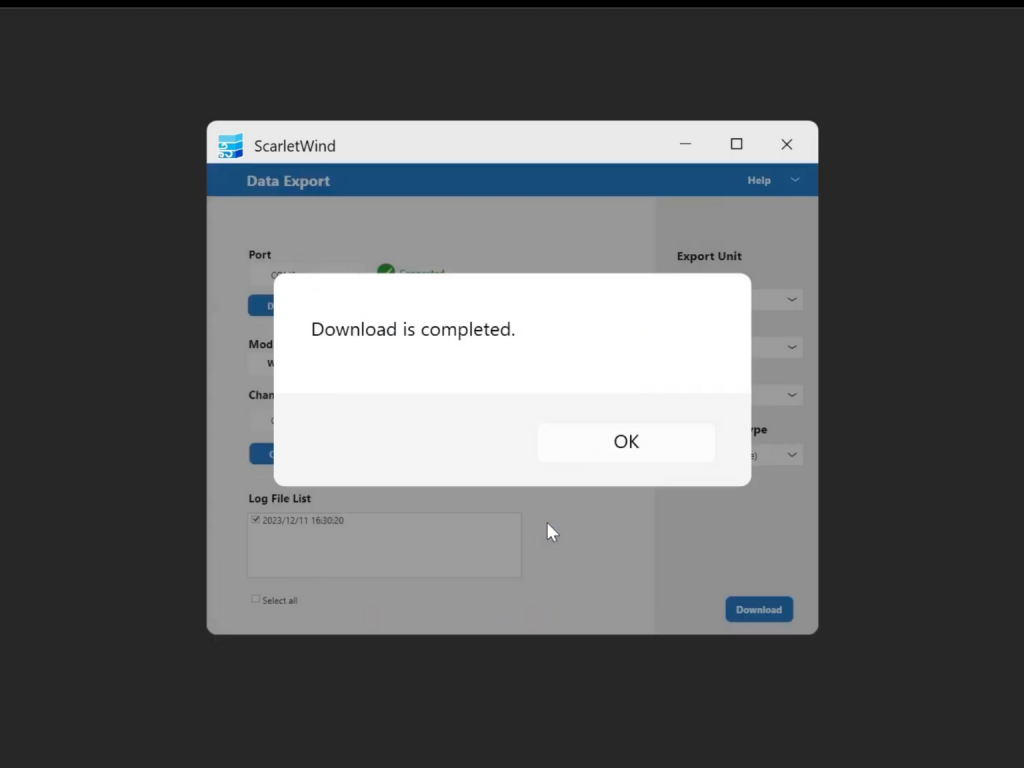
h. Once the download is complete, a message will appear: “Download is completed”. Click “OK” to finish.
Need video tutorials?
Check the YouTube videos for both WR-3 Plus & WL-21 and WindPro to walk you through the process step-by-step.